Design
March 14, 2024

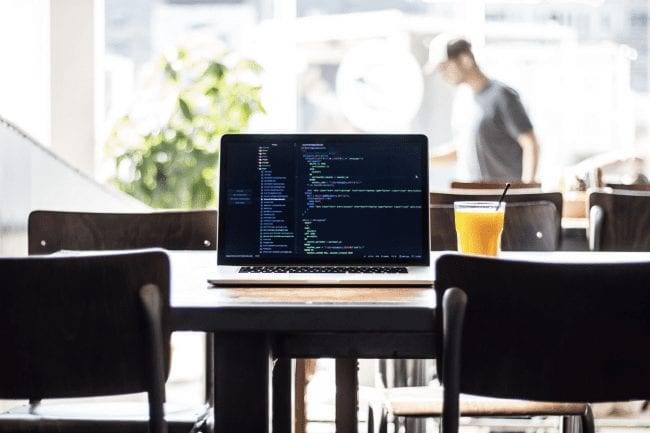
[et_pb_section admin_label="section"] [et_pb_row admin_label="row"] [et_pb_column type="4_4"][et_pb_text admin_label="Text"]As we all know, content is king in this digital world. Reaching out with your message is more than mere pull marketing, but a great way to attach style and value to all that you offer. Podcasts are great for this type of content creation, as evidenced by the existence of over three million podcasts active today. This is why so many coworking spaces are building their own podcast booths to help their business – and that of their members – thrive! Nevertheless, if not done right, costly expenditures and wasteful money pits may ruin your creative and commercial investment. Here’s what you need to know from the Deskworks team to build a podcast room on a shoestring budget.
First and foremost, you will need a digital audio workstation (DAW), complete with recording and editing software to make each episode present with clean, crisp, and professional audiovisuals. Mac or PC, desktop or laptop, tablet or smartphone, all can do the job. Nevertheless, your machine will need the appropriate memory space, processor, and USB ports to align with the rest of your equipment. We’ve seen marvelous things done with an iPhone, so find what works for you. As for software, GarageBand is great for Macs, and comes already installed. For PCs, we suggest Audacity, which is free and easy to use.
One of the most important pieces of your podcasting equipment is your microphone. If you get it wrong, there is little you can do to improve things later. Aesthetics can be ignored; most quality microphones don’t look cool or nifty. First try a few, depending on the acoustics of your space. Based on these conditions, your mic will sound different, so see if you can rent a couple and see what you like. We suggest Sennheiser, Audio Technica, and Shure mics, which you can get anywhere from $100 to $200.
Most of us don’t like the sound of our voice, due to some cranial discrepancy between what we think we sound like, and what the world takes in. Nevertheless, we do have to avoid some pitfalls in recording despite this natural aversion. The main one is noise bleed. You need headphones that will not leak noise out of the sides. Luckily, any over-the-ear headphones should work. Behringer headphones, for example, are around $20.
Hard surfaces cause the echoing that will drive you nuts. You certainly don’t want your podcast to sound like it was recorded in a hotel bathroom. If sound shoots off of a hard surface and falls upon a soft one, less resonance is created. Sure, you can use the all-too-famous foam egg crates, but there are affordable options that do you one better. When setting up our podcast rooms, we use one foot square foam blocks that are about two inches thick, available for about $2 each. But beware: if you go really crazy and line the whole room, it starts to sound dead. Total absorption is rather creepy, so allow a little resonance. At the end of the upper and lower corners, also put base absorbers, the strangely cut pieces of foam that get the job done well. Finally, a quick shoestring hack: use Command Strips. These $2 little pieces of adhesive serve as double-sided tape, but are way more effective.
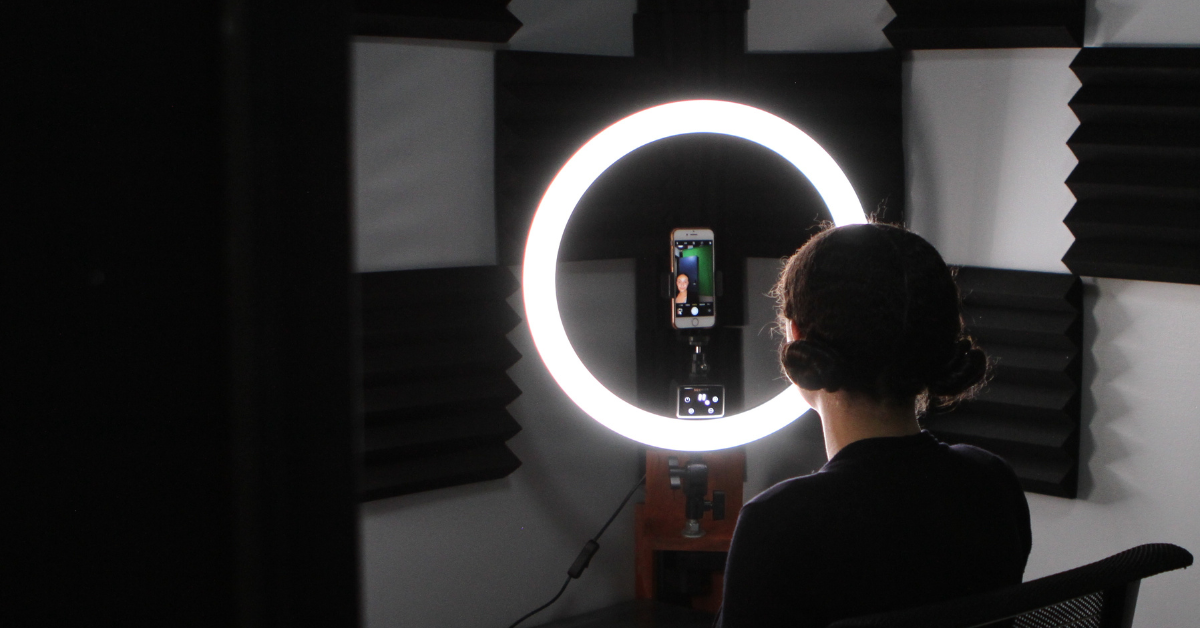
If you’re hoping to take your podcast to the next level, it’s important to involve some video elements as well. This makes for great social media posts and YouTube content. Plus, since you’re already spending time recording your voice, you might as well put your face to the sound. Most podcasts utilize either one camera set-up or multiple cameras. The former is much easier to edit, whilst the latter may offer more engaging content. To get you started, we suggest the single camera configuration, as it is cost-effective and easy to set up. Plus, it helps with lighting too (see below). The cameras don’t have to be expensive. Many two to three hundred dollar cameras can easily do the job. Moreover, you can do absolutely amazing things with just a smartphone.
After studying many lighting strategies, we keep coming back to the Three Point Lighting Scheme. As the name implies, it’s a system that involves two front lights (the Fill Light and the Key Light), both off to the side a bit with the camera in between, and one slightly raised Back Light, often called the Hair Light. The Key Light should be twice as strong as the Fill Light, that way you’re a little brighter on one side, and not flatly photographed. The Back Light is behind you and generally up high. This creates a halo effect and really makes you stand out. You want lights that are rated at variable heats on the Kelvin Scale. 6000 is a really bright white. 2500 is a yellow hue. It’s good to have them all in the same approximate range. It depends on what you’re trying to portray. Also, another shoestring hack: use TV mounts. Mount one for the main fill light, and one for the key light, so you can adjust them up and down until you’re happy with what you got!
Two key, insider secrets to the success of a green screen are the quality of the fabric and the way it is hung. A wrinkle-resistant fabric that is non-reflective can be a lifesaver. They can be found anywhere from $70 to $200 online, and can bring great value to your Podcasting Booth.In the end, as long as you keep your budget in mind, comprehend your community’s needs, know what your members might be interested in, and do your research before you buy, success is bound to come your way. Not only for you, but for your entire coworking space! [/et_pb_text][/et_pb_column] [/et_pb_row] [/et_pb_section]
Design
March 14, 2024
See how Deskworks helps coworking operators grow revenue while staying people-first.
Book a Demo
Deskworks is simple, powerful coworking management software built to automate your operations, capture every dollar of revenue, and give you more time to focus on your community.